
Driving at night or in low-visibility conditions can be dangerous if your vehicle’s headlights aren’t properly adjusted. Misaligned headlights can reduce your ability to see the road ahead and may even blind other drivers. If your headlights seem too dim, too high, or uneven, it’s time to make some adjustments.
In this article, we'll guide you through the simple steps to adjust your headlights for maximum visibility, ensuring safer and more comfortable driving at night. Keep reading to learn how you can easily fix this common issue and get back on the road with confidence!
Signs Your Headlights Need Adjustment
It’s important to be aware of when your headlights need adjusting to ensure you’re driving safely. Or else, having misaligned headlights in your vehicle can impair your visibility and become a hazard to other drivers. Here are the key signs that indicate your headlights may need some attention:
-
Headlights pointing too high or low – If your headlights are aimed too high, they can blind oncoming drivers and fail to illuminate the road directly in front of you. If they are too low, your visibility will be limited, making it difficult to see obstacles or road signs at a distance.
-
Uneven illumination on the road – Properly adjusted headlights should evenly distribute light across the road. If one side is brighter than the other or the light appears scattered, your alignment may be off.
-
Frequent flashing from oncoming drivers – If other drivers constantly flash their high beams at you, it’s a clear sign that your headlights are too bright or misaligned, causing glare that affects their visibility.
If you notice any of these signs, it’s time to adjust your headlights to ensure safe and effective lighting on the road.
Preparation Before Adjustment
Before adjusting your headlights, it’s important to set up properly to ensure accurate results. A few simple preparations can make the process easier and more effective.
Gather Necessary Tools
Having the right tools on hand will help you complete the adjustment smoothly. Here’s what you’ll need:
-
Screwdriver or adjustment tool – Depending on your vehicle, you may need a Phillips screwdriver, a Torx wrench, or a special adjustment tool. Check your owner’s manual for the correct one.
-
Measuring tape – Used to measure the height of your headlights and mark reference points on the wall.
-
Masking tape – Helps mark the correct alignment points on the surface in front of your car for precise adjustments.
Vehicle Setup
Proper vehicle positioning ensures accurate headlight alignment. Follow these steps before making adjustments:
-
Ensure tires are properly inflated – Uneven tire pressure can slightly tilt your vehicle, affecting headlight positioning.
-
Remove excess weight from the vehicle – If you typically drive with a heavy load, adjust headlights under normal driving conditions to get the most accurate results.
-
Park on a level surface facing a flat wall – Position your car about 25 feet away from a garage door or wall to create a clear projection for adjustment.
-
Ensure the gas tank is at least half full – A nearly empty or full tank can alter the vehicle’s balance, slightly changing headlight aim.
Once you’ve gathered your tools and set up your vehicle properly, you’re ready to move on to marking reference points for adjustment.
Step-by-Step Guide To Adjust Your Headlights for Maximum Visibility
Now that your vehicle is properly set up, follow these steps to adjust your headlights accurately.
Step 1: Mark Reference Points
Before making any adjustments, you need clear reference points to guide the alignment process.
-
Park on a level surface about 25 feet away from a flat wall or garage door. The distance may vary slightly depending on your vehicle’s manual, but 25 feet is a good general guideline.
-
Measure the height from the ground to the center of each headlight and note the measurement.
-
Using masking tape, mark a horizontal line across the wall at the same height as the headlight centers. This will act as a reference for the vertical adjustment.
-
Place a vertical strip of tape in the center of each headlight’s position on the wall. This helps ensure the beam is centered and not misaligned to one side.
Step 2: Adjust Headlights Vertically
Misaligned headlights that are too high can blind other drivers, while headlights aimed too low won’t provide enough road visibility.
-
Turn on the low beams and observe where the brightest part of the beam lands on the wall.
-
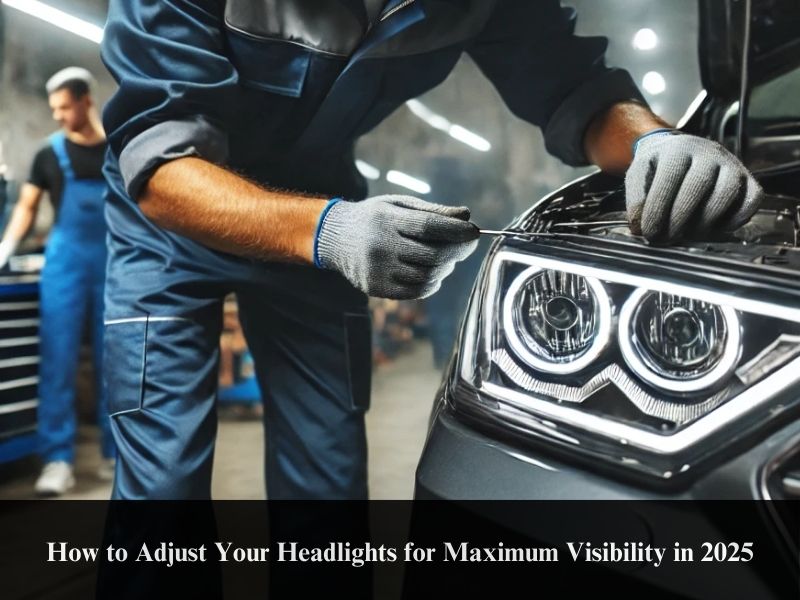
Locate the vertical adjustment screw near the back of each headlight. Some vehicles may have both vertical and horizontal screws on the headlight assembly.
-
Using a screwdriver or the appropriate tool, turn the screw to move the beam up or down.
-
Adjust the beam until the top edge of the brightest part aligns slightly below the horizontal tape line. This prevents glare while ensuring maximum road illumination.
Step 3: Adjust Headlights Horizontally
Headlights that are aimed too far left or right can create dangerous blind spots or cause glare for other drivers.
-
Find the horizontal adjustment screw, usually positioned near the headlight housing.
-
Slowly turn the screw to move the beam left or right until it is centered on the vertical tape line.
-
The brightest part of the beam should be focused directly ahead, rather than tilting too far outward or inward.
Step 4: Check and Adjust for Low Beam Accuracy
-
Stand a few feet in front of the car and check if both beams are symmetrical.
-
The top of the low beam cut-off should sit just below the horizontal line to prevent blinding other drivers.
-
If one beam appears misaligned, repeat the vertical and horizontal adjustments as needed.
Step 5: Test Your Headlights on the Road
After making adjustments, test your headlights in real driving conditions:
-
Drive on a dark road to ensure the beams properly illuminate the road ahead without excessive glare.
-
Check for even lighting – if one side appears brighter or lower, fine-tune the adjustments.
-
Observe oncoming drivers – if you get frequent flashes from other vehicles, your headlights may still be too high.
By following these steps, you can improve your nighttime visibility and ensure safer driving conditions. Regularly checking and adjusting your headlights will help maintain optimal performance over time.
Tips for Optimal Visibility
Proper headlight alignment is essential for safe driving, but a few additional adjustments can help you get the best visibility without causing glare for others. Below are some key tips to fine-tune your low and high beam positioning.
1. For Low Beam Positioning
Low beams are designed to provide a clear view of the road ahead while minimizing glare for oncoming drivers. Proper alignment ensures they illuminate the road effectively without causing distractions.
-
Keep the beam below the horizontal line – When adjusting your headlights, the brightest part of the low beam should be aimed slightly below the horizontal tape line on the wall. This prevents it from shining directly into the eyes of other drivers.
-
Angle slightly to the right – The left side of the beam should dip slightly lower than the right to reduce glare for oncoming traffic while still lighting up road signs and the shoulder.
-
Check your vehicle’s manual – Some cars have factory-recommended settings for low beam adjustment, so it's always best to confirm the ideal alignment for your specific model.
2. For High Beam Adjustment
High beams provide maximum illumination for driving on dark roads, but improper alignment can cause excessive glare and blind other drivers. Properly adjusting them ensures better visibility without compromising road safety.
-
Align them higher than the low beams – High beams should point straight ahead but slightly higher than the low beam cutoff. Unlike low beams, they don’t need to be angled downward.
-
Test in an open area – To check if your high beams are well-adjusted, drive in an area with minimal streetlights. The beam should illuminate the road ahead without spreading too widely or creating excessive brightness.
-
Avoid using high beams in traffic – Even if they are perfectly aligned, high beams should only be used on empty roads or highways without oncoming vehicles to avoid blinding other drivers.
By fine-tuning both your low and high beams, you can achieve the best possible nighttime visibility while keeping the roads safe for everyone. Regularly checking your headlight alignment will ensure you maintain optimal performance over time.
Is It Worth Upgrading to LED Headlights for Your Car?
Absolutely yes. If you're considering an upgrade, LED headlights offer some compelling reasons to make the switch:
-
Energy Efficiency – LEDs consume less power, reducing strain on your vehicle’s electrical system and improving fuel efficiency.
-
Longer Lifespan – Unlike halogen bulbs that burn out quickly, LED headlights can last tens of thousands of hours, minimizing replacements.
-
Better Road Visibility – LEDs provide brighter, clearer light output, improving night driving safety. They also illuminate instantly without needing a warm-up period.
-
Modern Aesthetics – A switch to LEDs gives your car a sleek, modern look, enhancing its overall appearance.
However, LED headlights might not be ideal for everyone. Higher initial costs and potential compatibility issues with older vehicle models could be drawbacks. If budget is a concern, halogen or Xenon options may still provide decent performance.
Ultimately, the choice depends on whether you prioritize visibility, efficiency, and long-term savings.
Are There Aftermarket LED Options for Your Vehicle’s Headlights?
Yes, aftermarket LED options are available for upgrading your vehicle’s headlights. These LED kits are designed to fit various vehicle models, providing a range of solutions from simple bulb replacements to full headlight assemblies.
When considering aftermarket LED headlights, you can expect the following benefits:
-
Customization: Select from different light patterns, colors, and brightness levels to give your vehicle a personalized touch.
-
Performance Enhancements: Some aftermarket kits include upgraded features such as better cooling systems, projectors, LED halos, or integrated turn signal lights.
-
Cost-Effective: Aftermarket LED headlights are often more affordable than original equipment manufacturer (OEM) alternatives, offering great quality and performance at a lower price.
When shopping for aftermarket LED headlights, be sure to check that they are compatible with your specific vehicle model, comply with safety regulations, and come from trusted manufacturers to ensure high performance and durability.
Related Articles
-
Top 12 Tips to Find the Best LED Headlights for Your Vehicle in 2024
-
How to Install LED Headlight Bulbs: Quick & Simple Guide for 2024
- How to Adjust High Beam Headlights for Optimal Road Safety
Best LED Headlights for Your Car in 2025: Our Top Recommendations
Upgrading your car with LED headlights is a fantastic way to improve visibility, enhance safety, and elevate the overall driving experience. Below are some of the best LED headlight options for a wide range of vehicles in 2025, designed to boost your car’s performance and style.
1. Carifex Non-Flickering LED Headlights

Carifex Non-Flickering LED Headlights offer consistent and stable light output, ensuring superior visibility during nighttime driving and in challenging weather conditions.
Key Specifications:
-
Bulb Type: LED Headlight Bulb
-
Wattage: 100W per set (50W per bulb)
-
Lumens: 10,000 lumens per set (5,000 lumens per bulb)
-
Color Temperature: 6,500K (bright white)
-
Lifespan: Up to 30,000 hours
-
Voltage: Compatible with 12V/24V vehicles
What’s Included:
-
Two Carifex Non-Flickering LED headlight bulbs
-
User manual
Compatibility:
-
These compact, fanless bulbs are designed for a variety of car models, providing an easy and effective upgrade for improved visibility and performance.
2. Carifex Pro Fit LED Headlight Bulbs

Carifex Pro Fit LED Headlight Bulbs offer exceptional brightness and energy efficiency, making them a perfect upgrade for those seeking durability and high performance.
Key Specifications:
-
Bulb Type: LED Headlight Bulb
-
Lumens: Up to 7,000 lumens per set
-
Color Temperature: 6,000K (cool white)
-
Lifespan: Up to 50,000 hours
-
Power: 70W per set (35W per bulb)
-
Voltage: DC 12-24V
-
Waterproof Rating: IP68
What’s Included:
-
Carifex Pro Fit LED headlight bulbs
-
Instruction manual for easy installation
-
VIP 24/7 after-sale customer support
Compatibility:
-
Specifically designed for a secure fit in a variety of car models, these headlights offer optimal efficiency and performance for both city driving and off-road adventures.
3. Compact LED Headlight Bulbs by Carifex

Compact LED Headlight Bulbs provide a budget-friendly yet reliable lighting solution, delivering excellent performance without breaking the bank.
Key Specifications:
-
Wattage: 35W
-
Lumens: 6,000 per bulb
-
Color Temperature: 6,000K (cool white)
-
Lifespan: 50,000 hours
-
LED Chip: Supercharged CREE LED chip
-
Installation Time: Under 30 minutes
What’s Included:
-
Compact LED headlight bulbs
-
Instruction manual
-
VIP 24/7 after-sale customer support
Compatibility:
-
These bulbs are designed for a direct-fit installation, ensuring a seamless upgrade with reliable performance for a wide range of car models, offering a factory-like integration.
These LED headlights are designed to enhance your car’s safety, functionality, and aesthetic appeal, ensuring that every drive is both enjoyable and secure. Choose the option that best suits your needs and enjoy the long-lasting benefits of this modern upgrade!
Where to Buy the Best LED Headlight Bulbs For My Vehicle in 2025
Ready to enhance your vehicle's headlights with high-performance LED bulbs? At Carifex, we provide a comprehensive selection of the latest LED lighting solutions tailored for a variety of vehicles, including LED Headlights, LED Tail Lights, LED Fog Lights, and many more.
Here’s why Carifex is your top choice for LED headlight bulbs:
-
Quality Assurance: Our LED bulbs adhere to rigorous quality standards, ensuring dependable and long-lasting performance whether you're on the highway or navigating off-road terrain.
-
Wide Selection: We offer a diverse range of designs and styles to complement your vehicle's aesthetics while fulfilling your lighting needs.
-
Competitive Pricing: Benefit from great value with our affordable pricing, making it easy to upgrade your vehicle’s lighting system without breaking the bank.
-
Customer Satisfaction: Our dedicated team is committed to providing outstanding customer service, helping you choose the ideal product and offering support with installation.
Explore our range of headlights and other LED automotive products today. Click below to visit our store and discover the perfect upgrades for your vehicle!
Final Thoughts
Properly adjusted headlights are essential for safe nighttime driving, ensuring optimal road visibility while preventing glare for other drivers. By following the steps outlined in this guide, you can easily fine-tune your headlights for maximum performance. Regular checks and adjustments will help maintain their effectiveness over time.
Additionally, upgrading to LED headlights can enhance brightness, longevity, and efficiency, making them a worthwhile investment for many drivers. Whether you're adjusting your existing headlights or considering an upgrade, prioritizing visibility and safety will lead to a better driving experience.
Key Takeaways
-
Misaligned headlights can reduce visibility and cause glare for other drivers, making adjustments essential for safe driving.
-
Common signs of misalignment include headlights pointing too high or low, uneven illumination, and frequent flashing from oncoming drivers.
-
Proper preparation before adjustment includes ensuring correct tire pressure, removing excess weight, and parking on a level surface.
-
Marking reference points on a wall helps guide vertical and horizontal adjustments for precise headlight alignment.
-
Adjusting the vertical alignment ensures that headlights don’t blind other drivers while providing sufficient road illumination.
-
Correcting the horizontal alignment helps center the beams, preventing dangerous blind spots and uneven lighting.
-
Testing your headlights on a dark road is crucial to confirm proper alignment and make necessary fine-tuning adjustments.
-
Regular maintenance of headlights improves long-term performance and ensures continued nighttime visibility.
-
Upgrading to LED headlights can enhance brightness, energy efficiency, and overall vehicle aesthetics.
-
Aftermarket LED options provide customization and performance enhancements but should be chosen carefully for compatibility and safety compliance.
FAQs
How often should I adjust my headlights?
It's advisable to check and adjust your headlights periodically, especially after any changes in vehicle loading or suspension. Regular checks can ensure optimal visibility and safety.
Can I adjust my headlights myself, or do I need a mechanic?
Yes, you can adjust your headlights yourself. It's a straightforward process that involves aligning the beams with reference points on a wall. However, if you're unsure, consulting a mechanic is always an option.
How far should my car be from the wall when adjusting headlights?
Generally, park your vehicle 25 feet away from a wall or garage door. However, check your owner's manual for specific recommendations, as some vehicles may require different distances.
Do LED headlights require manual adjustment?
Some LED headlights are self-leveling and do not require manual adjustment. However, this varies by vehicle model, so it's best to consult your owner's manual.
What is the correct position for the headlight beam?
The beam should be aimed so that the brightest part (hotspot) is just below the line of sight of oncoming drivers. This helps prevent glare while maintaining visibility.
How do I ensure my headlights are properly aligned for safety?
Proper alignment ensures that the beam hits the road ahead without blinding oncoming traffic. Use reference marks on a wall and adjust the headlights accordingly to achieve this.


