
Replacing a headlight bulb is a simple yet essential task every car owner should be able to do. Whether you're dealing with a dimming light or a completely burned-out bulb, knowing how to replace your headlight bulb can save you time and money.
In this step-by-step guide, we'll walk you through the process of replacing the headlight bulb on any car in 2025. Keep reading to learn the tools you'll need, the easy-to-follow steps, and some helpful tips to ensure your headlights shine bright and clear, keeping you safe on the road.
Without further ado, let’s get started…
Tools You'll Need
Before you begin replacing the headlight bulb, make sure you have the following tools on hand:
-
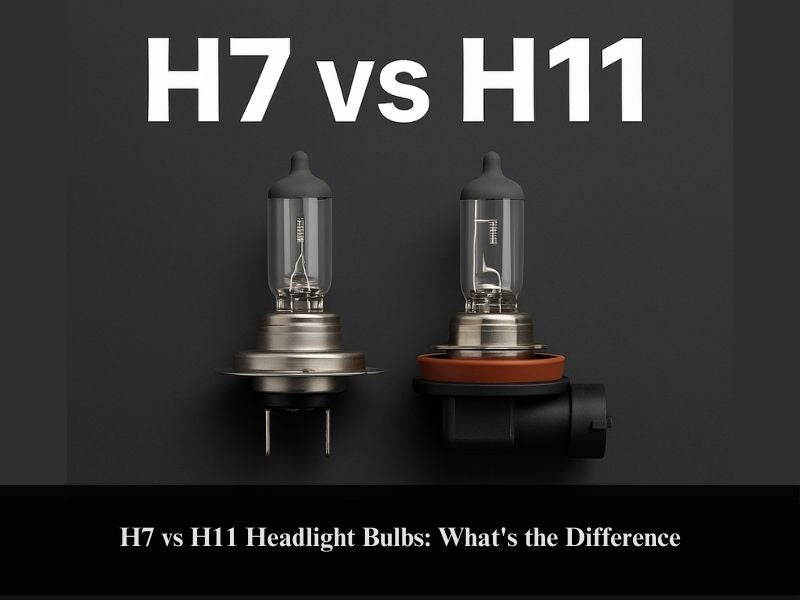
Replacement Bulb: Ensure you have the correct type of bulb for your vehicle’s make and model. Refer to your owner’s manual or check online for the right fit.
-
Screwdriver: Depending on your car, you’ll need either a Phillips or flat-head screwdriver to remove any screws securing the headlight assembly.
-
Clean Cloth or Gloves: Handling the bulb with a clean cloth or gloves helps prevent oil or dirt from getting on the bulb. This can extend its lifespan and maintain its brightness.
-
Optional: Socket and Ratchet Set: In some cases, you may need a socket and ratchet set to remove bolts or fasteners. This tool is especially useful if the headlight is more tightly secured.
-
Optional: Pliers: If the bulb is stuck or the connectors are tight, pliers can help safely remove them without damaging the components.
Having these tools ready will make the replacement process smoother and more efficient. Once you’ve gathered everything, you’re ready to get started!
General Step-by-Step Guide To Replace Headlight Bulb on Any Car
Replacing a headlight bulb can be straightforward if you follow the right steps. Here’s a general guide that applies to most vehicles:
Step 1: Preparation
Before you start replacing the headlight bulb, it's crucial to take the necessary safety precautions and prepare your vehicle.
-
Park the Car on a Level Surface: Make sure your car is parked on a flat, stable surface to prevent any movement while you work.
-
Turn Off the Engine: For your safety, ensure the engine is off before you begin.
-
Engage the Handbrake: This will help keep your car stationary and prevent it from rolling.
-
Open the Hood: Find the hood release inside the car and lift the hood to access the engine compartment.
-
Locate the Back of the Headlight Assembly: Look for the area behind the headlight where the bulb is installed. This is usually a plastic cover or a housing that holds the bulb in place.
Once you've completed these initial steps, you're ready to move on to removing the old bulb and installing the new one.
Step 2: Access the Bulb
Now that you’ve prepared your vehicle, it’s time to access the headlight bulb.
-
Remove the Headlight Assembly Cover: If there is a cover or plastic housing around the back of the headlight, carefully remove it to expose the bulb. You may need to gently pry it off or unscrew it, depending on the design of your vehicle.
-
Loosen Any Screws or Clips: Some vehicles have screws or clips securing the cover or headlight assembly in place. Use a screwdriver to loosen these fasteners, making sure not to strip them. Keep the screws or clips in a safe place for reassembly.
-
Remove Other Parts (If Needed): In some cases, the headlight bulb might be hidden behind other components, such as the bumper or the battery. If this is the case, you may need to remove additional parts, such as the air filter or other nearby panels, to gain better access to the bulb.
Once you’ve successfully accessed the bulb area, you’re ready to move on to removing the old bulb and replacing it with the new one.
Step 3: Remove the Old Bulb
With the headlight assembly exposed, it’s time to remove the old bulb carefully. Follow these steps:
-
Disconnect the Electrical Connector: Locate the electrical connector attached to the back of the bulb. Gently press the clip or release tab to disconnect the connector from the bulb. Be cautious not to damage the wires or connector.
-
Twist the Bulb Socket Counterclockwise: Once the connector is removed, grab the bulb socket and twist it counterclockwise. This should release the socket from its housing. In some cases, there may be retaining clips instead of a twist mechanism, so check for those and unclip them if necessary.
-
Gently Pull Out the Old Bulb: After the socket is freed, gently pull the bulb out of the headlight assembly. Be careful not to apply too much force to avoid damaging the housing or other components.
With the old bulb removed, you’re now ready to install the new bulb.
Step 4: Install the New Bulb
Now that the old bulb is removed, it’s time to install the new one. Follow these steps to ensure proper installation:
-
Avoid Touching the Glass Part of the New Bulb: When handling the new bulb, avoid touching the glass with your bare hands. Oil and dirt from your skin can create hot spots on the bulb, causing it to burn out prematurely. Use a clean cloth or wear gloves to handle the bulb.
-
Insert the New Bulb into the Socket: Carefully place the new bulb into the socket, making sure it is aligned properly. Push it in gently until it’s securely seated in the socket.
-
Twist the Socket Clockwise to Lock It in Place: Once the bulb is seated, twist the socket clockwise to lock it into position. Make sure it is tightly secured, as this will prevent the bulb from shifting or coming loose.
With the new bulb in place, you’re now ready to reconnect the electrical connector and test the light.
Step 5: Reassemble
Now that the new bulb is installed, it’s time to reassemble everything:
-
Reconnect the Electrical Connector: Attach the electrical connector back to the new bulb. Ensure it clicks into place securely, so there’s a solid connection for the power supply.
-
Secure Any Covers or Clips: If you had to remove any covers, clips, or other parts to access the bulb, make sure to put them back in place. Tighten any screws or clips that were loosened during the disassembly process.
With everything reassembled, you’re almost done! The next step is to test the new bulb and ensure it’s working correctly.
Step 6: Test the Headlights
The final step is to ensure that the new bulb is functioning correctly:
-
Turn on Your Headlights: Start your car and turn on the headlights to check if the new bulb is working as expected.
-
Check the Light: If the headlight lights up properly and is shining at the correct intensity, you’re all set!
If the bulb doesn’t light up, double-check the connections and make sure the bulb is securely installed. In some cases, you may need to adjust the bulb or revisit the installation steps. Once everything is working, you're good to go!
By following these simple steps, you can replace the headlight bulb on most vehicles and ensure that your headlights are in top working condition. If you encounter any issues or are unsure about any part of the process, don’t hesitate to seek professional assistance.
Tips For Choosing the Right Bulb
Choosing the right headlight bulb is crucial for optimal visibility and performance. Here are some tips to help you make the right choice:
-
Refer to Your Car's Manual: Always check your vehicle’s manual to confirm the correct bulb type and wattage. The manual will provide specific details on the bulb size, shape, and other requirements tailored to your car's make and model.
-
Consider Upgrading to LED or Halogen Bulbs: If you’re looking for improved brightness and energy efficiency, consider upgrading to LED or halogen bulbs. LED bulbs offer better energy efficiency, longer lifespan, and brighter light, while halogen bulbs are a more affordable option with good brightness.
-
Check for Compatibility: Make sure the replacement bulb you choose is compatible with your vehicle’s headlight assembly. Some modern cars use special headlight designs, like HID (High-Intensity Discharge) or Xenon, so choose accordingly.
-
Look for Quality Brands: Opt for reputable brands to ensure you’re getting a high-quality bulb that will last longer and perform better. Check reviews and ask for recommendations if you're unsure about which brand to trust.
By following these tips, you can ensure your new headlight bulb offers the best performance, visibility, and longevity for your vehicle.
Related Articles:
-
Top 12 Tips to Find the Best LED Headlights for Your Vehicle in 2024
-
Brightest LED Headlight Bulbs For Safe Driving At Night: Guide
Best LED Headlights for Your Car in 2025: Our Top Recommendations
Upgrading your car with LED headlights is a fantastic way to improve visibility, enhance safety, and elevate the overall driving experience. Below are some of the best LED headlight options for a wide range of vehicles in 2025, designed to boost your car’s performance and style.
1. Carifex Non-Flickering LED Headlights

Carifex Non-Flickering LED Headlights offer consistent and stable light output, ensuring superior visibility during nighttime driving and in challenging weather conditions.
Key Specifications:
-
Bulb Type: LED Headlight Bulb
-
Wattage: 100W per set (50W per bulb)
-
Lumens: 10,000 lumens per set (5,000 lumens per bulb)
-
Color Temperature: 6,500K (bright white)
-
Lifespan: Up to 30,000 hours
-
Voltage: Compatible with 12V/24V vehicles
What’s Included:
-
Two Carifex Non-Flickering LED headlight bulbs
-
User manual
Compatibility:
-
These compact, fanless bulbs are designed for a variety of car models, providing an easy and effective upgrade for improved visibility and performance.
2. Carifex Pro Fit LED Headlight Bulbs

Carifex Pro Fit LED Headlight Bulbs offer exceptional brightness and energy efficiency, making them a perfect upgrade for those seeking durability and high performance.
Key Specifications:
-
Bulb Type: LED Headlight Bulb
-
Lumens: Up to 7,000 lumens per set
-
Color Temperature: 6,000K (cool white)
-
Lifespan: Up to 50,000 hours
-
Power: 70W per set (35W per bulb)
-
Voltage: DC 12-24V
-
Waterproof Rating: IP68
What’s Included:
-
Carifex Pro Fit LED headlight bulbs
-
Instruction manual for easy installation
-
VIP 24/7 after-sale customer support
Compatibility:
-
Specifically designed for a secure fit in a variety of car models, these headlights offer optimal efficiency and performance for both city driving and off-road adventures.
3. Compact LED Headlight Bulbs by Carifex

Compact LED Headlight Bulbs provide a budget-friendly yet reliable lighting solution, delivering excellent performance without breaking the bank.
Key Specifications:
-
Wattage: 35W
-
Lumens: 6,000 per bulb
-
Color Temperature: 6,000K (cool white)
-
Lifespan: 50,000 hours
-
LED Chip: Supercharged CREE LED chip
-
Installation Time: Under 30 minutes
What’s Included:
-
Compact LED headlight bulbs
-
Instruction manual
-
VIP 24/7 after-sale customer support
Compatibility:
-
These bulbs are designed for a direct-fit installation, ensuring a seamless upgrade with reliable performance for a wide range of car models, offering a factory-like integration.
These LED headlights are designed to enhance your car’s safety, functionality, and aesthetic appeal, ensuring that every drive is both enjoyable and secure. Choose the option that best suits your needs and enjoy the long-lasting benefits of this modern upgrade!
Important Tips
To ensure a successful headlight bulb replacement, keep these important tips in mind:
-
Always Wear Gloves When Handling a New Bulb: When installing a new bulb, always wear gloves or use a clean cloth to handle it. Oils from your skin can damage the bulb and shorten its lifespan. Gloves will also protect the bulb from dirt and grease, ensuring it operates efficiently.
-
Make Sure the New Bulb Is Placed Correctly in the Holder: Ensure that the new bulb is properly aligned and securely seated in the socket. An improperly installed bulb can cause it to malfunction or even damage the headlight assembly.
-
Secure the Bulb's Cover to Keep Electrics Waterproof: After installing the new bulb, make sure to securely reattach any cover or casing around the bulb. This protects the electrical components from water, dirt, and other debris, ensuring the longevity of the bulb and the electrical system.
By following these tips, you’ll maximize the performance and lifespan of your new headlight bulb while maintaining the integrity of your vehicle’s electrical system.
What If You're Not Confident?
If you're unsure about replacing the headlight bulb yourself, don’t worry—there are options available:
-
Consider Professional Fitting Services: If you’re not comfortable with the process or lack the necessary tools, you can take your vehicle to a professional mechanic or an auto service center. They can quickly and safely replace the bulb for you, ensuring the job is done correctly.
-
Newer Vehicles with Halogen Bulbs: Many newer vehicles, especially those with halogen bulbs, may require special tools or techniques for bulb replacement. In some cases, the design of the headlight assembly may make it difficult or impossible to change the bulb on your own. If this is the case, seeking professional assistance is a good option.
If you’re not confident in handling the replacement, getting help from a professional can save you time and ensure your vehicle’s headlights function properly.
Where to Buy the Best LED Headlight Bulbs For My Vehicle in 2025
Ready to enhance your vehicle's headlights with high-performance LED bulbs? At Carifex, we provide a comprehensive selection of the latest LED lighting solutions tailored for a variety of vehicles, including LED Headlights, LED Tail Lights, LED Fog Lights, and many more.
Here’s why Carifex is your top choice for LED headlight bulbs:
-
Quality Assurance: Our LED bulbs adhere to rigorous quality standards, ensuring dependable and long-lasting performance whether you're on the highway or navigating off-road terrain.
-
Wide Selection: We offer a diverse range of designs and styles to complement your vehicle's aesthetics while fulfilling your lighting needs.
-
Competitive Pricing: Benefit from great value with our affordable pricing, making it easy to upgrade your vehicle’s lighting system without breaking the bank.
-
Customer Satisfaction: Our dedicated team is committed to providing outstanding customer service, helping you choose the ideal product and offering support with installation.
Explore our range of headlights and other LED automotive products today. Click below to visit our store and discover the perfect upgrades for your vehicle!
Final Thoughts
Replacing a headlight bulb is a straightforward task that any car owner can manage with the right tools and guidance.
By following the step-by-step instructions outlined in this guide, you can save time and money while ensuring your headlights remain in top condition, providing optimal visibility and safety on the road. Whether you opt for traditional halogen bulbs or decide to upgrade to LED headlights for better performance, it’s essential to choose the right bulb for your car model. If you're not confident in performing the replacement yourself, professional help is always an option.
In any case, regularly maintaining your headlights is a small investment in your vehicle’s safety and functionality.
Key Takeaways
-
Knowing how to replace your headlight bulb is a crucial skill for any car owner, helping you maintain safety and visibility on the road.
-
Ensure you have a replacement bulb, screwdriver, clean cloth or gloves, and possibly a socket and ratchet set or pliers to perform the replacement efficiently.
-
Always park your car on a level surface, turn off the engine, engage the handbrake, and open the hood before beginning the replacement process.
-
Remove any covers, screws, or clips securing the headlight assembly to gain access to the old bulb.
-
Safely disconnect the electrical connector from the bulb, being careful not to damage any wires.
-
Twist the bulb socket counterclockwise and gently pull out the old bulb.
-
Handle the new bulb with gloves or a clean cloth, avoid touching the glass, and ensure it's securely seated and twisted into place.
-
Once the new bulb is installed, reconnect the electrical connector and reattach any covers or clips to complete the reassembly process.
-
Always test the new bulb by turning on the headlights to ensure it's functioning correctly and providing the proper light intensity.
-
Refer to your car’s manual for the correct bulb type, and consider upgrading to LED or halogen bulbs for better performance and energy efficiency.
FAQs
Can I replace just one headlight bulb?
Yes, you can replace one bulb at a time. However, it's often recommended to replace both bulbs to ensure consistent brightness and color.
How do I know when my headlight bulb needs to be replaced?
Signs include dimming lights, flickering, or a complete failure of the bulb. If one headlight is out, it's a good indication that it may be time for a replacement.
Are mismatched headlights legal?
This depends on local laws and regulations. It's generally advisable to have matching headlights for safety and compliance reasons.
What if I can't access the headlight bulb easily?
Some cars may require removing additional components to reach the bulb. Consult your vehicle's manual for guidance or consider seeking professional help.
What type of replacement bulb do I need for my car?
Check your vehicle's manual or consult with an auto parts store to find the correct bulb type and specifications for your make and model.